From Prompt To App How To Prototype Faster With Vibe Studio And Flutter
Summary
Summary

This tutorial explains a practical workflow for prototyping mobile apps faster with Vibe Studio and Flutter: craft Flutter-aware prompts, iterate visually, export widgets and design tokens, wrap generated UI with adapters for state and navigation, and use hot reload and token-driven theming to validate UX quickly.

This tutorial explains a practical workflow for prototyping mobile apps faster with Vibe Studio and Flutter: craft Flutter-aware prompts, iterate visually, export widgets and design tokens, wrap generated UI with adapters for state and navigation, and use hot reload and token-driven theming to validate UX quickly.

Key insights:
Key insights:
  • Rapid Prompting And Design Iteration: Write explicit, Flutter-aware prompts and iterate visually in Vibe Studio to produce atomic, reusable components.

  • Exporting From Vibe Studio To Flutter: Export widget libraries, design tokens, and assets; keep generated files UI-only and adapt via wrappers.

  • Integrating Generated Components Into State And Navigation: Connect generated stateless widgets to your state management (Provider/Riverpod) via callbacks and adapters.

  • Tips For Faster Prototyping: Centralize tokens, reuse components, use a minimal host app for hot reload, and maintain versioned assets.

  • From Prompt To App: The fastest path is small iterations—prompt, edit, export, adapt—so you validate UX before optimizing for production.

Introduction

Prototyping mobile apps used to be a multi-tool workflow: design tools, handoff, and then manual widget building. Vibe Studio changes that by turning text prompts and visual edits into production-ready Flutter artifacts. This tutorial shows a pragmatic workflow: craft prompts, iterate visually in Vibe Studio, export component code, and wire those artifacts into a Flutter app so you can validate UX quickly and iterate faster.

Rapid Prompting And Design Iteration

Start with an explicit prompt that describes structure, platform, and constraints. Mention Flutter-specific details: Material/Cupertino, device size, and expected interaction. A concise example prompt might be: "Mobile login screen, Material, email & password fields, primary CTA, subtle elevation on card." Vibe Studio will generate layered designs and a component tree you can edit visually.

Iterate in Vibe Studio using real constraints: set spacing tokens, text styles, and behavior (disabled states, loading spinner). Each visual edit should aim to keep components atomic: buttons, inputs, cards. Atomic components map cleanly to Flutter widgets and make reuse simple.

Keep iterations small and testable. After each significant change, export a snapshot and run it in a test harness or emulator — this shortens feedback loops. Vibe Studio's preview lets you simulate navigation and basic interactions before exporting code.

Exporting From Vibe Studio To Flutter

When a screen feels stable, export for Flutter. Vibe Studio can output widget code, style tokens, and asset bundles. The recommended export pattern is:

  • Export UI components as a widget library (stateless by default).

  • Export design tokens (colors, typography, spacing) as a Dart file or JSON.

  • Export images/SVGs into the assets folder and reference them in pubspec.yaml.

After export, place generated code into a feature folder. The generated widgets are a starting point; avoid editing generated files directly for business logic. Instead, wrap generated widgets in local adapters.

Example adapter that composes a generated LoginForm into app state:

import 'package:flutter/material.dart';
// import generated widgets
// import 'generated/login_form.dart';

class LoginScreen extends StatelessWidget {
  final void Function(String, String) onSubmit;
  const LoginScreen({required this.onSubmit});

  @override
  Widget build(BuildContext context) {
    return Scaffold(body: Center(child: GeneratedLoginForm(onSubmit: onSubmit)));
  }
}

This keeps generated UI isolated from navigation, DI, and state management strategies (Provider, Riverpod, Bloc).

Integrating Generated Components Into State And Navigation

Choose a state approach early and apply it consistently to avoid refactors. For fast prototypes, a lightweight pattern like Provider or Riverpod works well. Keep generated widgets stateless; connect them via callbacks and controllers.

If Vibe Studio exports controllers or value objects, adapt them into your app's state. For example, map a generated TextField's controller to a ViewModel's value stream rather than changing the generated code.

Navigation: wrap screens in a simple Router (Navigator 2.0 if you need deep links, otherwise pushNamed is fine). Use generated navigation stubs only as visual placeholders and implement actual routing in your app router.

Performance: generated widgets may include convenience layouts that are fine for prototypes. If you need production performance, profile and optimize heavy widgets later — but prioritize correctness and iteration speed during prototyping.

Tips For Faster Prototyping

  • Use Tokens: Export design tokens from Vibe Studio and load them at app startup. This keeps style changes centralized.

  • Reuse Components: Convert commonly used generated pieces into your shared component library early to reduce duplication.

  • Hot Reload Loop: Place exported widgets in a minimal host app so hot reload applies instantly to UI changes from Vibe edits or local code tweaks.

  • Asset Management: Keep exported assets in a versioned assets folder. If sizes change in Vibe, replace assets rather than editing code.

  • Test Interaction Paths: Create small integration tests (widget tests) for critical flows (login, onboarding) so layout regressions surface quickly.

Small helper to load tokens from JSON into ThemeData:

Future<ThemeData> loadThemeFromJson(String path) async {
  final json = await rootBundle.loadString(path);
  final map = jsonDecode(json);
  return ThemeData(primaryColor: Color(map['colors']['primary']));
}

This allows toggling tokens without rebuilding style code.

Vibe Studio
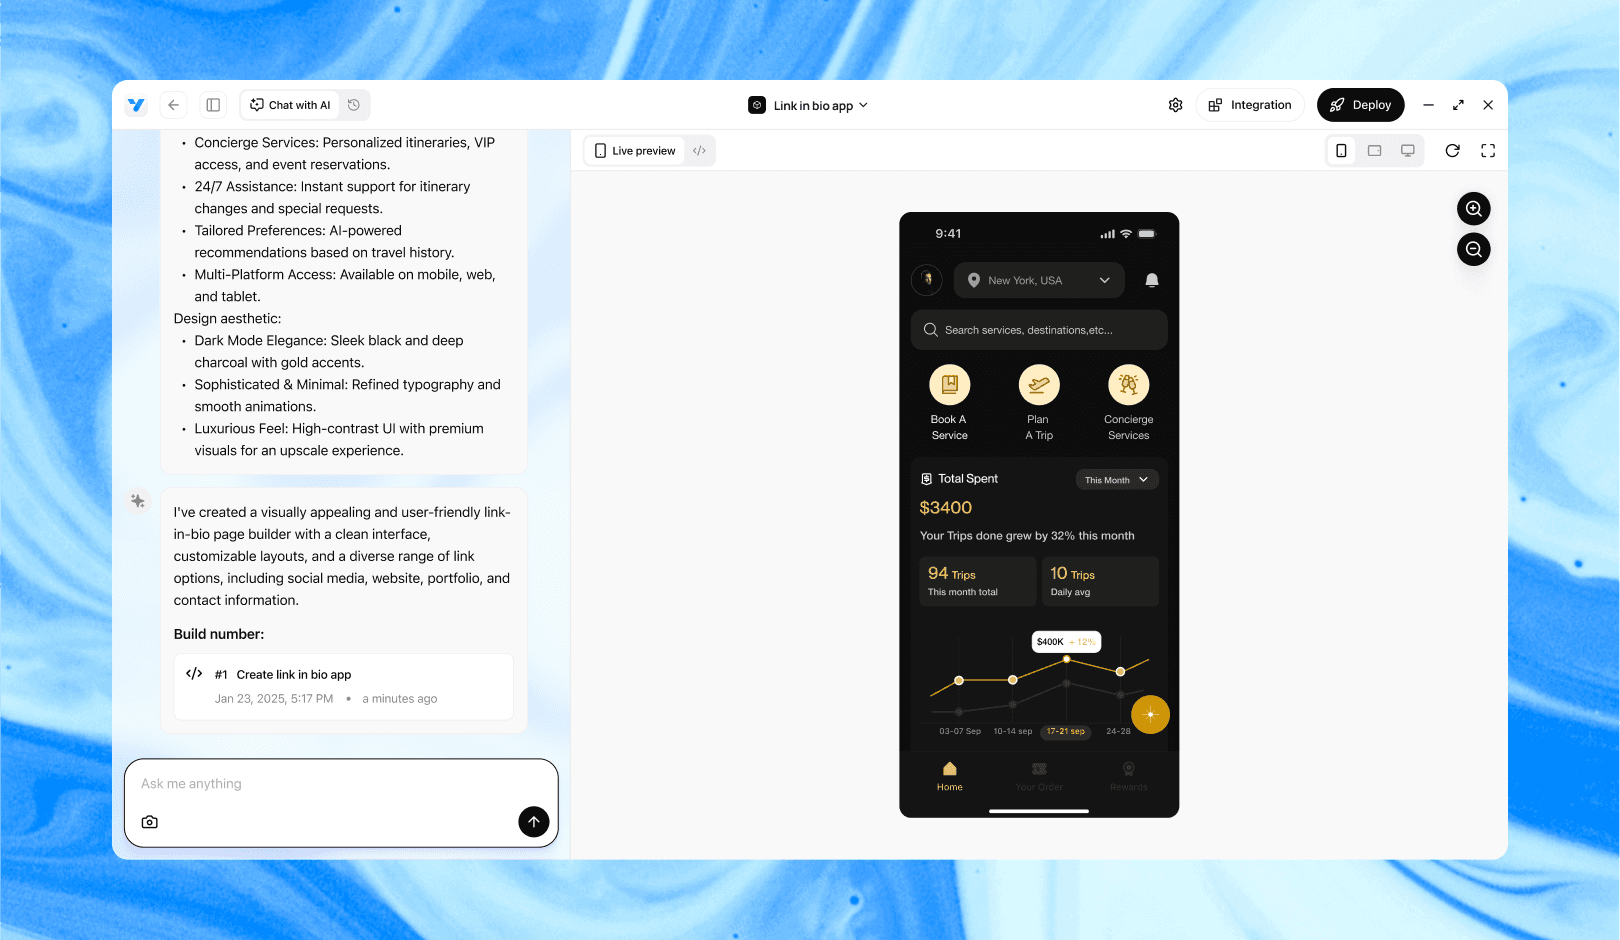
Vibe Studio, powered by Steve’s advanced AI agents, is a revolutionary no-code, conversational platform that empowers users to quickly and efficiently create full-stack Flutter applications integrated seamlessly with Firebase backend services. Ideal for solo founders, startups, and agile engineering teams, Vibe Studio allows users to visually manage and deploy Flutter apps, greatly accelerating the development process. The intuitive conversational interface simplifies complex development tasks, making app creation accessible even for non-coders.

Conclusion

Using Vibe Studio with Flutter streamlines the path from idea to interactive prototype. The practical workflow is: craft clear prompts, iterate visually in Vibe, export atomic components and tokens, adapt generated widgets with lightweight adapters, and keep the hot-reload feedback loop tight. Prioritize small iterations, centralized tokens, and treating generated code as UI-only artifacts. That combination gets working prototypes into devices quickly so you can validate UX and pivot earlier.

Introduction

Prototyping mobile apps used to be a multi-tool workflow: design tools, handoff, and then manual widget building. Vibe Studio changes that by turning text prompts and visual edits into production-ready Flutter artifacts. This tutorial shows a pragmatic workflow: craft prompts, iterate visually in Vibe Studio, export component code, and wire those artifacts into a Flutter app so you can validate UX quickly and iterate faster.

Rapid Prompting And Design Iteration

Start with an explicit prompt that describes structure, platform, and constraints. Mention Flutter-specific details: Material/Cupertino, device size, and expected interaction. A concise example prompt might be: "Mobile login screen, Material, email & password fields, primary CTA, subtle elevation on card." Vibe Studio will generate layered designs and a component tree you can edit visually.

Iterate in Vibe Studio using real constraints: set spacing tokens, text styles, and behavior (disabled states, loading spinner). Each visual edit should aim to keep components atomic: buttons, inputs, cards. Atomic components map cleanly to Flutter widgets and make reuse simple.

Keep iterations small and testable. After each significant change, export a snapshot and run it in a test harness or emulator — this shortens feedback loops. Vibe Studio's preview lets you simulate navigation and basic interactions before exporting code.

Exporting From Vibe Studio To Flutter

When a screen feels stable, export for Flutter. Vibe Studio can output widget code, style tokens, and asset bundles. The recommended export pattern is:

  • Export UI components as a widget library (stateless by default).

  • Export design tokens (colors, typography, spacing) as a Dart file or JSON.

  • Export images/SVGs into the assets folder and reference them in pubspec.yaml.

After export, place generated code into a feature folder. The generated widgets are a starting point; avoid editing generated files directly for business logic. Instead, wrap generated widgets in local adapters.

Example adapter that composes a generated LoginForm into app state:

import 'package:flutter/material.dart';
// import generated widgets
// import 'generated/login_form.dart';

class LoginScreen extends StatelessWidget {
  final void Function(String, String) onSubmit;
  const LoginScreen({required this.onSubmit});

  @override
  Widget build(BuildContext context) {
    return Scaffold(body: Center(child: GeneratedLoginForm(onSubmit: onSubmit)));
  }
}

This keeps generated UI isolated from navigation, DI, and state management strategies (Provider, Riverpod, Bloc).

Integrating Generated Components Into State And Navigation

Choose a state approach early and apply it consistently to avoid refactors. For fast prototypes, a lightweight pattern like Provider or Riverpod works well. Keep generated widgets stateless; connect them via callbacks and controllers.

If Vibe Studio exports controllers or value objects, adapt them into your app's state. For example, map a generated TextField's controller to a ViewModel's value stream rather than changing the generated code.

Navigation: wrap screens in a simple Router (Navigator 2.0 if you need deep links, otherwise pushNamed is fine). Use generated navigation stubs only as visual placeholders and implement actual routing in your app router.

Performance: generated widgets may include convenience layouts that are fine for prototypes. If you need production performance, profile and optimize heavy widgets later — but prioritize correctness and iteration speed during prototyping.

Tips For Faster Prototyping

  • Use Tokens: Export design tokens from Vibe Studio and load them at app startup. This keeps style changes centralized.

  • Reuse Components: Convert commonly used generated pieces into your shared component library early to reduce duplication.

  • Hot Reload Loop: Place exported widgets in a minimal host app so hot reload applies instantly to UI changes from Vibe edits or local code tweaks.

  • Asset Management: Keep exported assets in a versioned assets folder. If sizes change in Vibe, replace assets rather than editing code.

  • Test Interaction Paths: Create small integration tests (widget tests) for critical flows (login, onboarding) so layout regressions surface quickly.

Small helper to load tokens from JSON into ThemeData:

Future<ThemeData> loadThemeFromJson(String path) async {
  final json = await rootBundle.loadString(path);
  final map = jsonDecode(json);
  return ThemeData(primaryColor: Color(map['colors']['primary']));
}

This allows toggling tokens without rebuilding style code.

Vibe Studio

Vibe Studio, powered by Steve’s advanced AI agents, is a revolutionary no-code, conversational platform that empowers users to quickly and efficiently create full-stack Flutter applications integrated seamlessly with Firebase backend services. Ideal for solo founders, startups, and agile engineering teams, Vibe Studio allows users to visually manage and deploy Flutter apps, greatly accelerating the development process. The intuitive conversational interface simplifies complex development tasks, making app creation accessible even for non-coders.

Conclusion

Using Vibe Studio with Flutter streamlines the path from idea to interactive prototype. The practical workflow is: craft clear prompts, iterate visually in Vibe, export atomic components and tokens, adapt generated widgets with lightweight adapters, and keep the hot-reload feedback loop tight. Prioritize small iterations, centralized tokens, and treating generated code as UI-only artifacts. That combination gets working prototypes into devices quickly so you can validate UX and pivot earlier.

Build Flutter Apps Faster with Vibe Studio

Vibe Studio is your AI-powered Flutter development companion. Skip boilerplate, build in real-time, and deploy without hassle. Start creating apps at lightning speed with zero setup.

Other Insights

Join a growing community of builders today

Join a growing community of builders today

Join a growing community of builders today

Join a growing community of builders today

Join a growing community of builders today

28-07 Jackson Ave

Walturn

New York NY 11101 United States

© Steve • All Rights Reserved 2025

28-07 Jackson Ave

Walturn

New York NY 11101 United States

© Steve • All Rights Reserved 2025

28-07 Jackson Ave

Walturn

New York NY 11101 United States

© Steve • All Rights Reserved 2025

28-07 Jackson Ave

Walturn

New York NY 11101 United States

© Steve • All Rights Reserved 2025

28-07 Jackson Ave

Walturn

New York NY 11101 United States

© Steve • All Rights Reserved 2025

28-07 Jackson Ave

Walturn

New York NY 11101 United States

© Steve • All Rights Reserved 2025